
It’s a tradition of mine to roll out my new artwork in a blog post that outlines each of the thought processes that goes into creating it. I am happy to announce that I have finally wrapped up my latest drawing, Liquid Daze, and the following post outlines what went into its creation
As with all of my drawings, it starts off as a concept or an image in my head. In a similar manner where I have a hard time imagining the music notes that go into a song (or how to compose one), I talk with similar folks who can’t always picture what I have in my head. It’s funny, because it is almost crystal clear to me where I want to be, but I don’t always have the finer grained details. Like I have the big picture and the overall view, but not necessarily every line, or every beat, that goes into it.
My inspiration came from being out in nature, and our seemingly infinitely complex set of interactions we have with everyone, everything, and our own selves. These states are never stagnant, but effortlessly changing from one state to another, like a fluid that appears still but has molecules that are anything but that.
I found some stills on the internet that helped shape my initials thoughts:
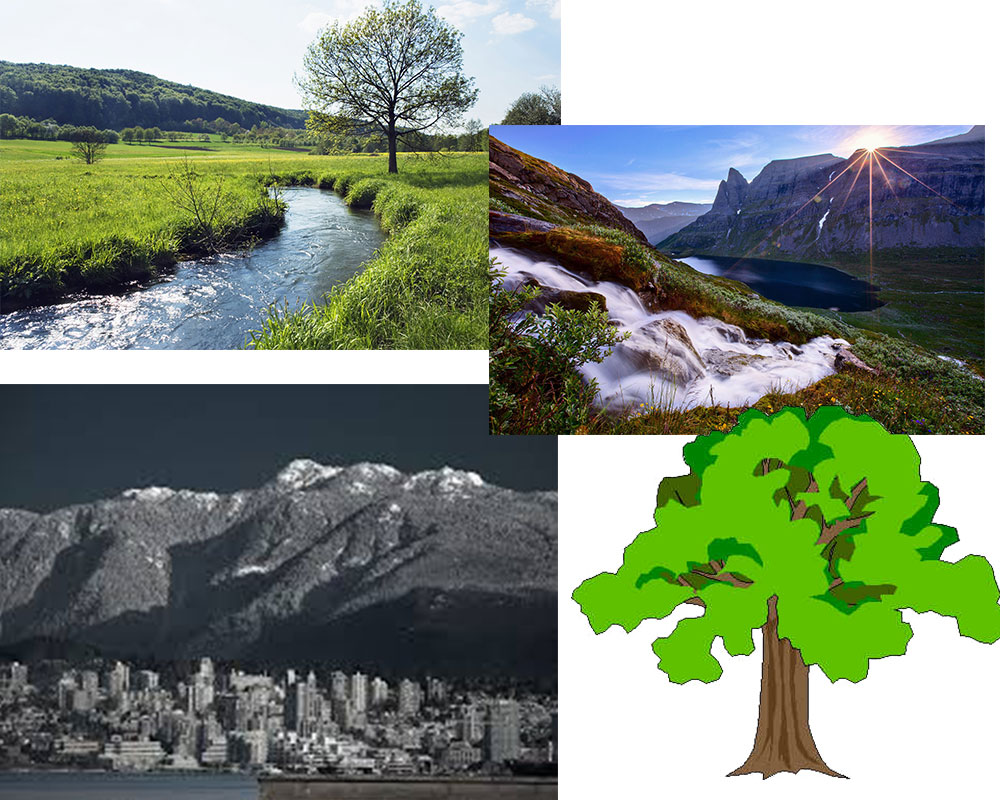
I took some inspiration from clipart, the shady mountainside, a nice stream, and a sun flare and turned it into something I wanted to share.
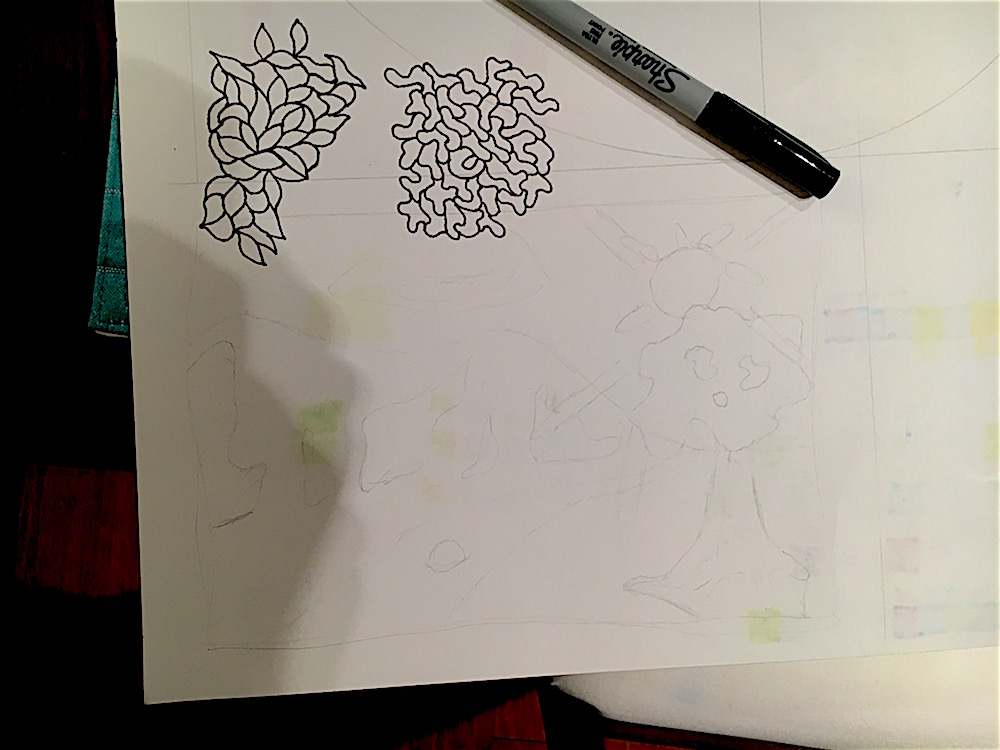
That was my whole concept drawing. In the pencil outline, I wanted a sky with a sun and some rays, a single tree with a creek or river, and some mountains in the background. What I was going to do over top of this drawing is what you see in black, where I was debating on a more ‘squiggly’ line pattern or a ‘cell’ style pattern. Given that my previous drawing DYSWIS had a squiggle effect already, I figured I would go with the more cell-style/fluid reflection approach.
From there it was on to sketching it on my final 24×19″ drawing paper. I didn’t really change much when I started this in October of 2016, other than adding an additional cloud.
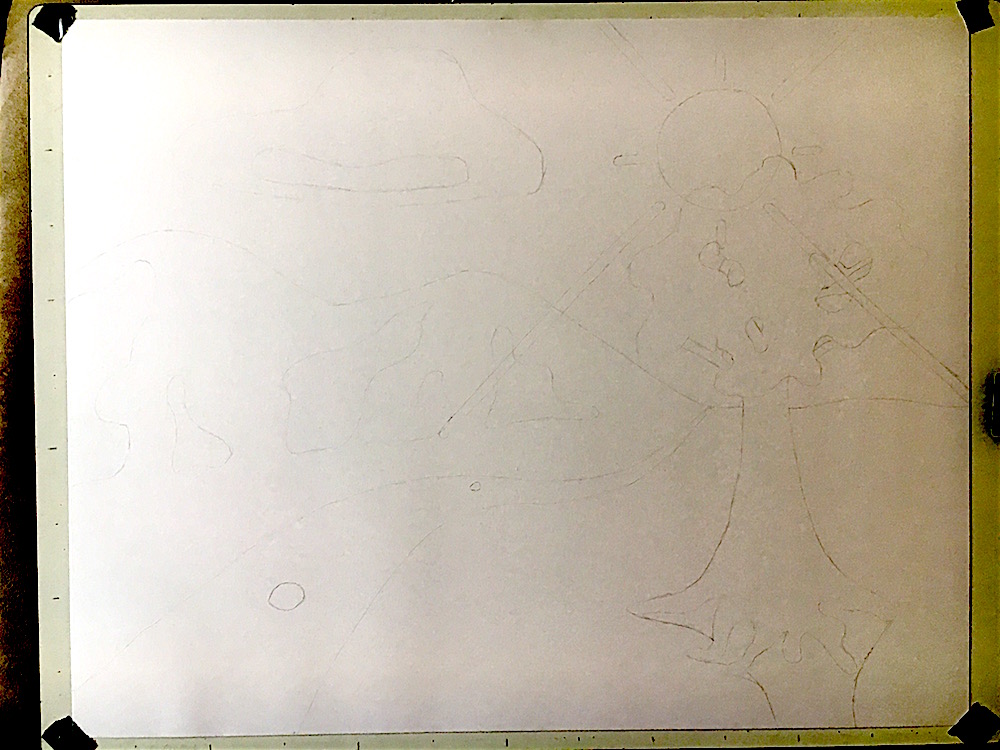
Nothing too crazy here, except for the fact that the pencil outline is so faint I have to adjust the colors in order for you to see it. I hope you can see the mountains, the mountain shadows, the stream, the tree and it’s shadow, and the sun – its the best you will be able to see it until it is done.
From there, my next step was to fill in the black pattern that I showed above. This next picture shows the mountain, stream, clouds, and tree with the cells drawn overtop.
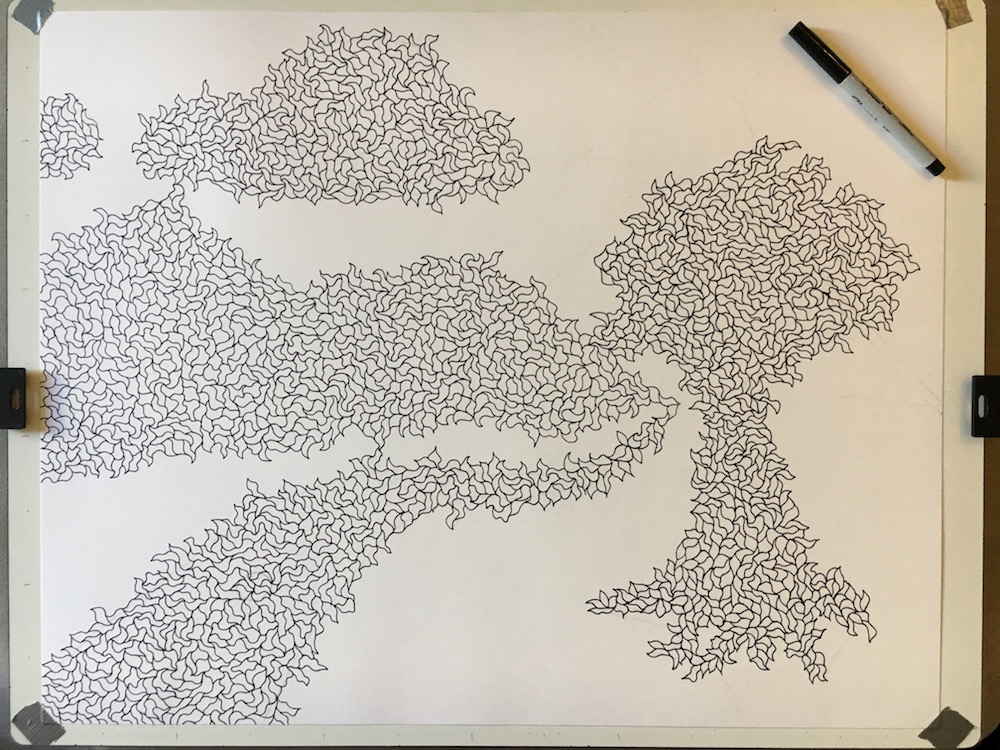
You can’t seem them, but I didn’t erase the pencil lines while I was doing this part. That way, when everything was complete I still knew the areas I needed to go back and color in certain ways.
After a good amount of time, near December of 2016 I finally was able to complete the whole cell outline.

That is a lot of cells. Everyone who saw this asked me “How do you keep track of where everything used to be?” My response was always focused around finding the tiny, faint pencil lines I had originally. Of course, if you blur your eyes you can kind of still see the tree (like I had slightly more dense cells in that area for some reason), but in my mind, those lines were mostly guidelines anyways.
After that was complete I went on a hiatus, as I mentioned in a previous post. Too many things going on at once and I was too scatter-brained to focus on one single task. Luckily I was able to get those things in order, and near April I started picking this drawing back up again.
The method to my madness was that I wanted a collage of color for any individual object, whether it be a tree, a cloud, or the grass, I needed to have a variety of color. To add to the complexity, for some shades I also didn’t want to have all the color evenly represented. I needed a couple base colors that were my common elements for the object, and then I would sprinkle in less and less common colors. This is kind of obvious when you realize I have only 5 or 6 shades of green, yet in the drawing (especially in real life) there are three very distinct patches of green.
Each color I would apply to a certain section in only a limited amount, and round-robin through all of these “sections” until I was done. How did I count only a certain amount per section? Easy. I sat there and for every cell I colored I counted up by one, when I got to ten, I moved on to a new section or new color. This is how you get the initial colors found here:
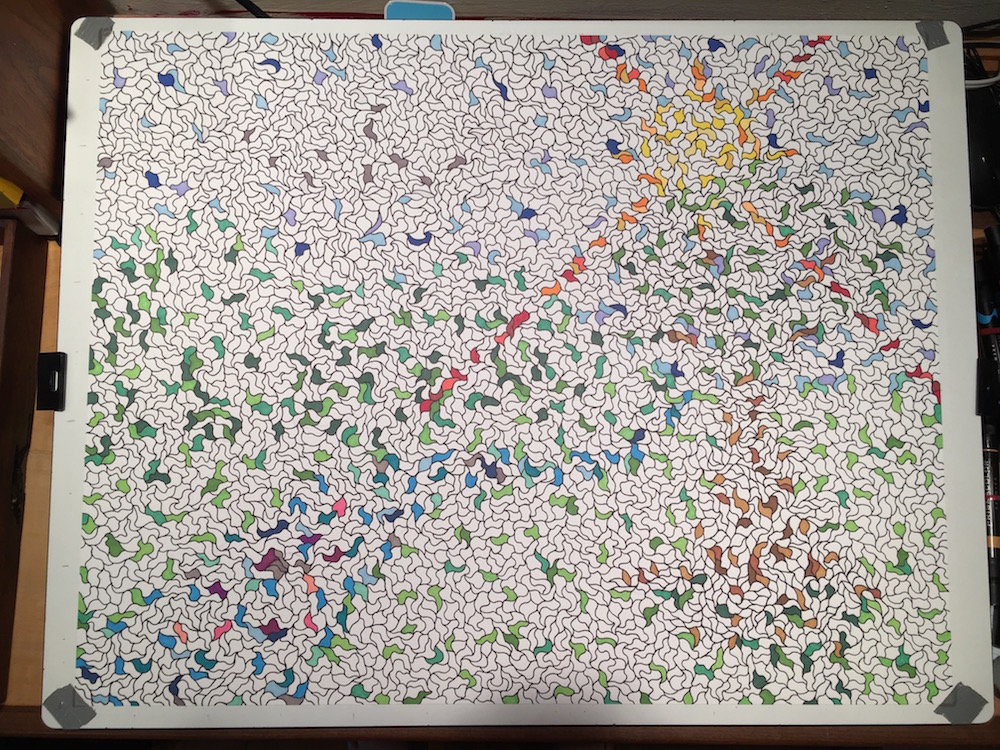
Given that there is still so much white, it is kind of hard to see how things are taking shape. Below are the 17 different sections I used to color everything in:
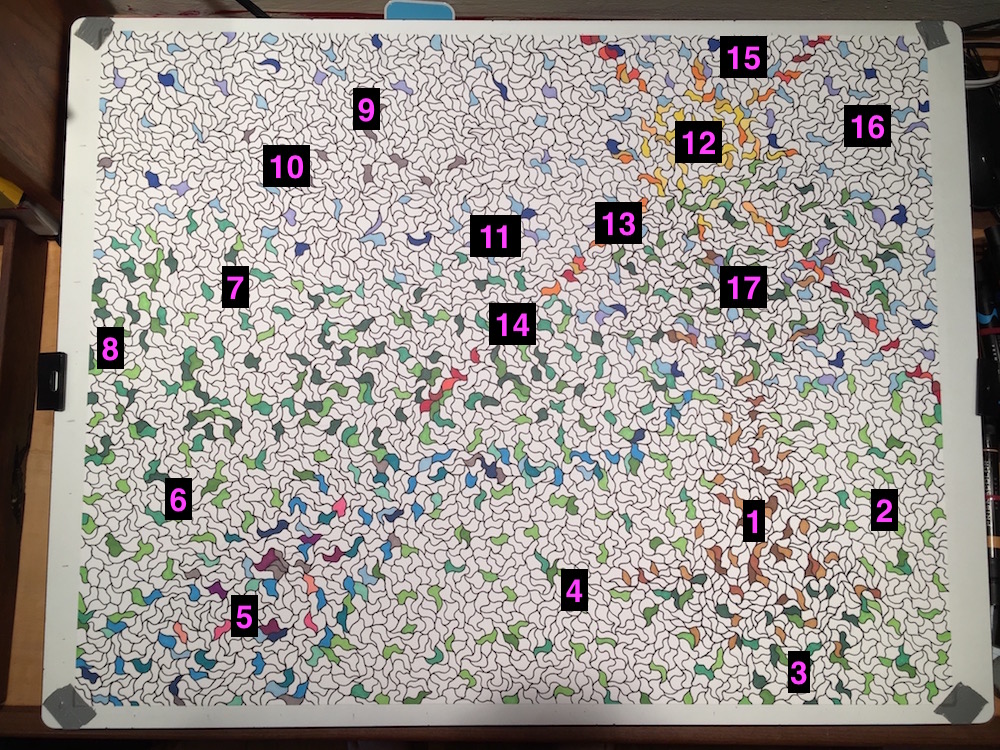
Easy, right? Lets continue coloring our sections in, counting from 1 through 10 for every color we want to have in those sections.
At this point, both the red and orange portion of the sun rays are complete, so we are at 2/17 sections done! The sun is close, the tree shadow is close, and a couple others are near completion. More coloring…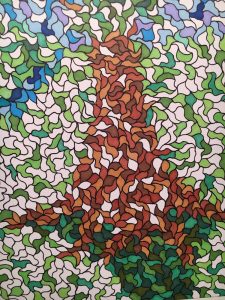
Just to give you a sense of scale. The tree trunk here looks pretty colored in right? Almost done? There are still ~36 white cells that needed to be filled in. My estimates during this phase were that it would take me around an hour to and hour and a half to color 10-15 cells in a region, across all 17 regions. Or in easier terms, a 3.5 minute song to color only 10 cells. So, coloring the rest of that tree in would take a good 12-15 minutes, when it looks so close to being complete.
Now compare that with the below checkpoint, where I have over half of the “sections” complete.
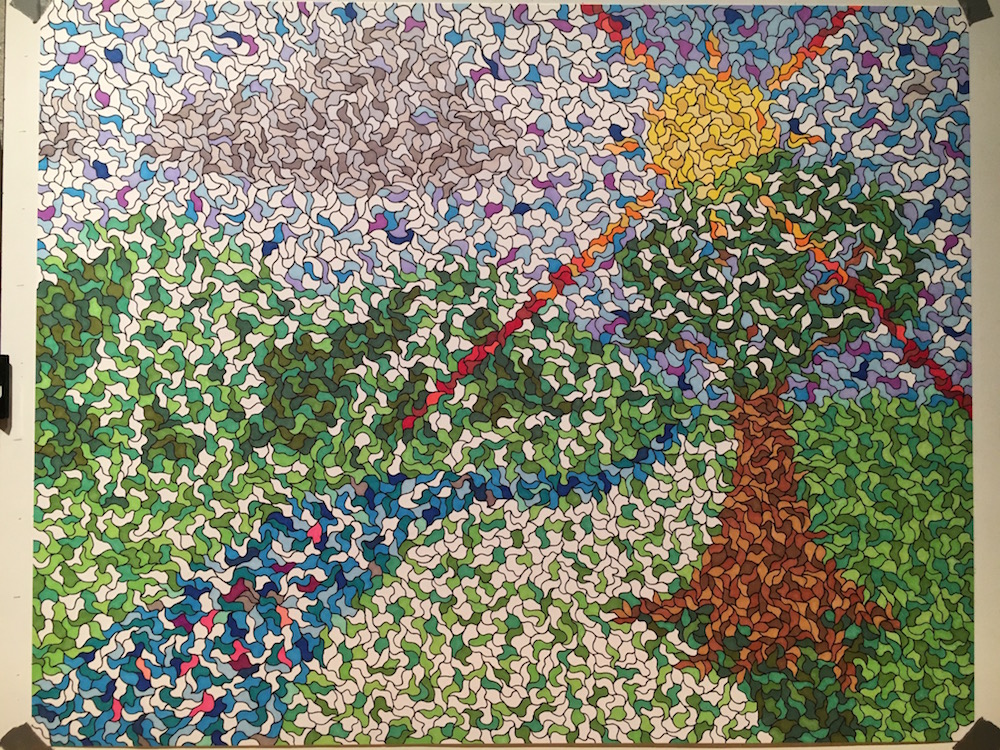
So close! Finally we have got some clouds, mountain shadows, the tree, some sections of grass, the sun, and parts of the sky complete. Getting to this stage was funny, because now that one of the smaller sections was complete, I had to make sure that the larger section I had not yet completed had the same overall effect. I couldn’t waiver from the madness of how I colored the sky with 5 different colors of varying frequency, couldn’t waiver from the grass coloring on the right side of the tree, because the left side needed to be exactly the same.
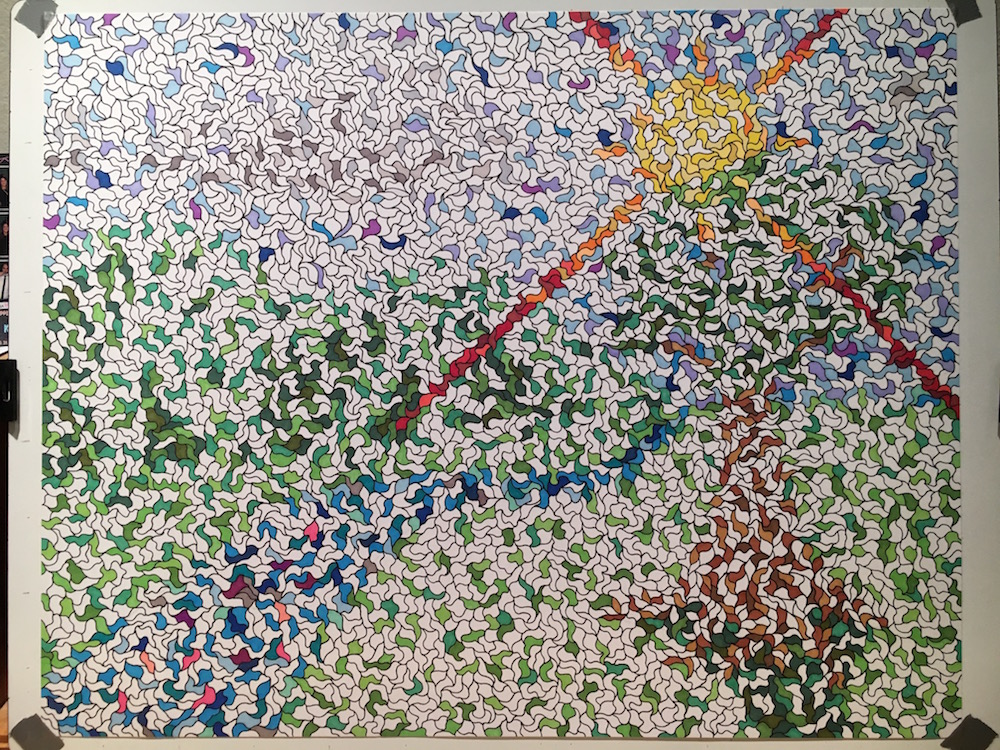
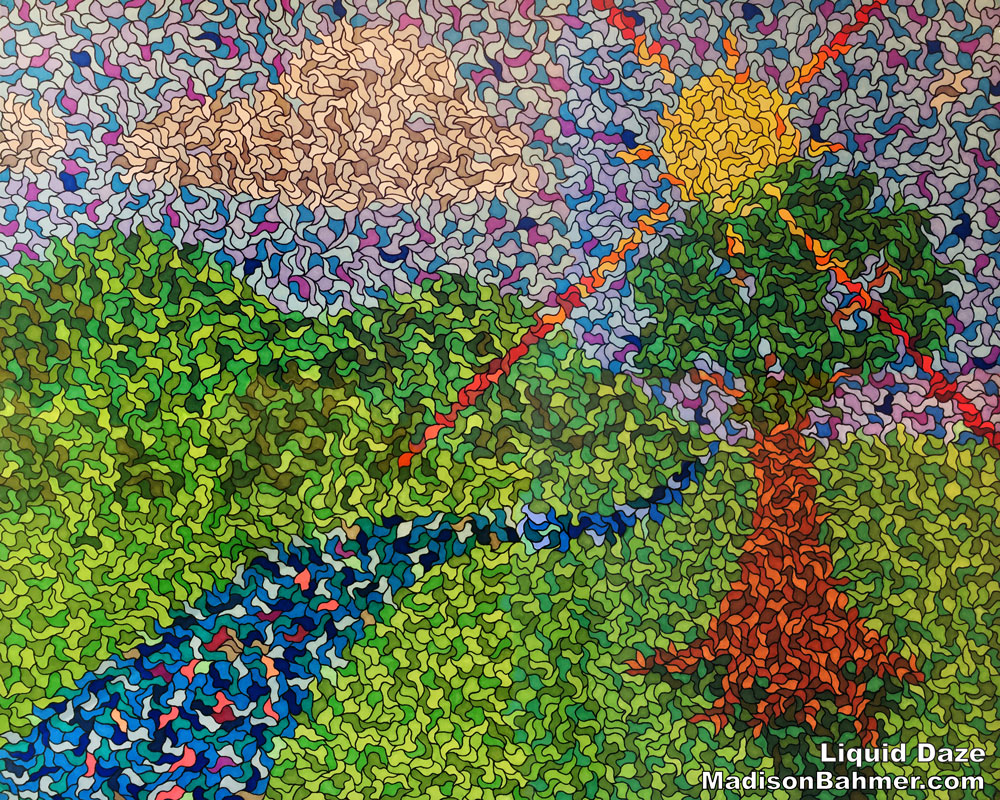
I think in the end I managed to pull it off. Below is the final picture straight from my phone, around 10pm on a Friday when I finished up the last cells.

Whew. I wish I had a computer vision program that would count the number of cells I colored in. Yes, even the very light portions of the cloud is colored in – that drove me crazy for a while because I was using such a light shade of gray, once the ink dried I couldn’t tell if it was colored in anymore.
Some people say at this point you are done. One of my goals is to continue to reach a wider audience and make my prints available to be recreated on whatever medium necessary, so I go the extra mile to try to translate what you can see in real life into a digital format.
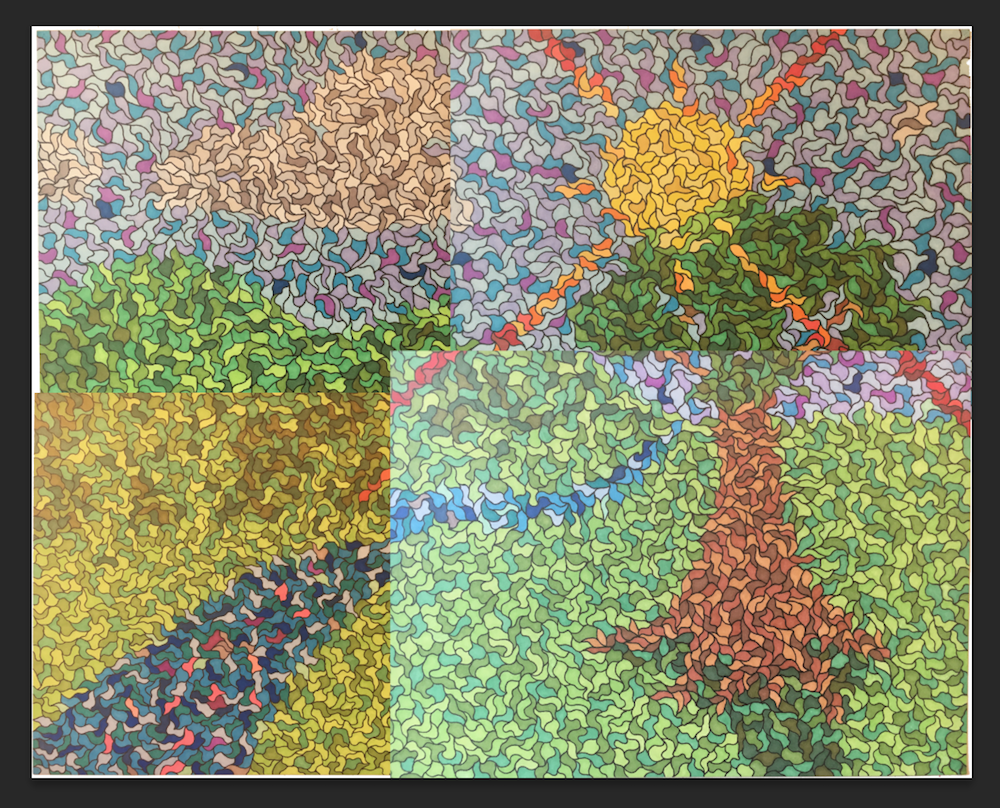
It’s a pain. Given that my phone doesn’t have a good enough resolution to take one ‘single’ picture, I need to take multiples and stitch them together. Maybe I look for a scanning store next time that will scan things at the resolution I need (I have never found one), as I spent probably another 6 hours of work in photoshop getting it into its final, reproducible form.
This is what I started with:
And this is how it ended up.
Now, I could continue to throw hours of work into tuning each picture and subsection, to get the colors just right, but in the end a lot of these artifacts are only present on your phone or computer display. I really wish I could just take the whole image and capture the resolution I needed to make it scalable to print on a tapestry, I really do, but this is what I ended up with after tinkering with the
- brightness
- contrast
- hue
- saturation
- exposure
- levels
- curves
- vibrance
- balance
And that doesn’t even include cropping and blending the disjoint images together so there are as little artifacts as possible, or erasing and warping portions of the image so all those cells line up just right. It’s kind of like taking a video at a concert, vs being there to truly experience it. They are just two different things.
In the end, I am both extremely happy with how this turned out, and proud of the finished product. The next large drawing I would like to do is already in my mind – all I need is time.
